Showing posts with label Canning. Show all posts

Thursday, December 1, 2011

Making Sauerkraut in a Jar

By Kathryn Washburn Breighner

A month or so ago, I listened to a food show on making sauerkraut that recommended a 21-day 'curing' period. We were heading to Europe within the next 21 days and I wouldn't be here to tend to the curing kraut and while in Berlin, I had some fresh kraut. And I knew I had to do this.

Easy? You bet. And the flavors are unlike those found in the grocery store. All it takes is cabbage, seasonings like caraway, salt, water and something to put the mixture in. I chose to make the sauerkraut in quart jars but this can also be done in a large ceramic crock.  One disadvantage of making this in the jars is that it takes some time to pack the cabbage into the jars.

For my kraut, I diced 2 heads of cabbage into small dice and tossed with 1 T salt and let sit for several hours. To this I added 3 T caraway seeds and then packed tightly into quart canning jars. I used the flat end of my rolling pen to compress the cabbage. To some of the cabbage, I added chopped apples (our orchards went crazy this year!), onions, and fennel seeds.

Next comes salt water, 1 T to a quart and poured over the chopped cabbage in the jars until the liquid covers the cabbage.  Finally, I topped the mixture with a leaf of cabbage. This leaf doesn't have to be covered with liquid but its presence prevents the build up of harmful bacteria. The jars were closed with a canning jar lid and ring.
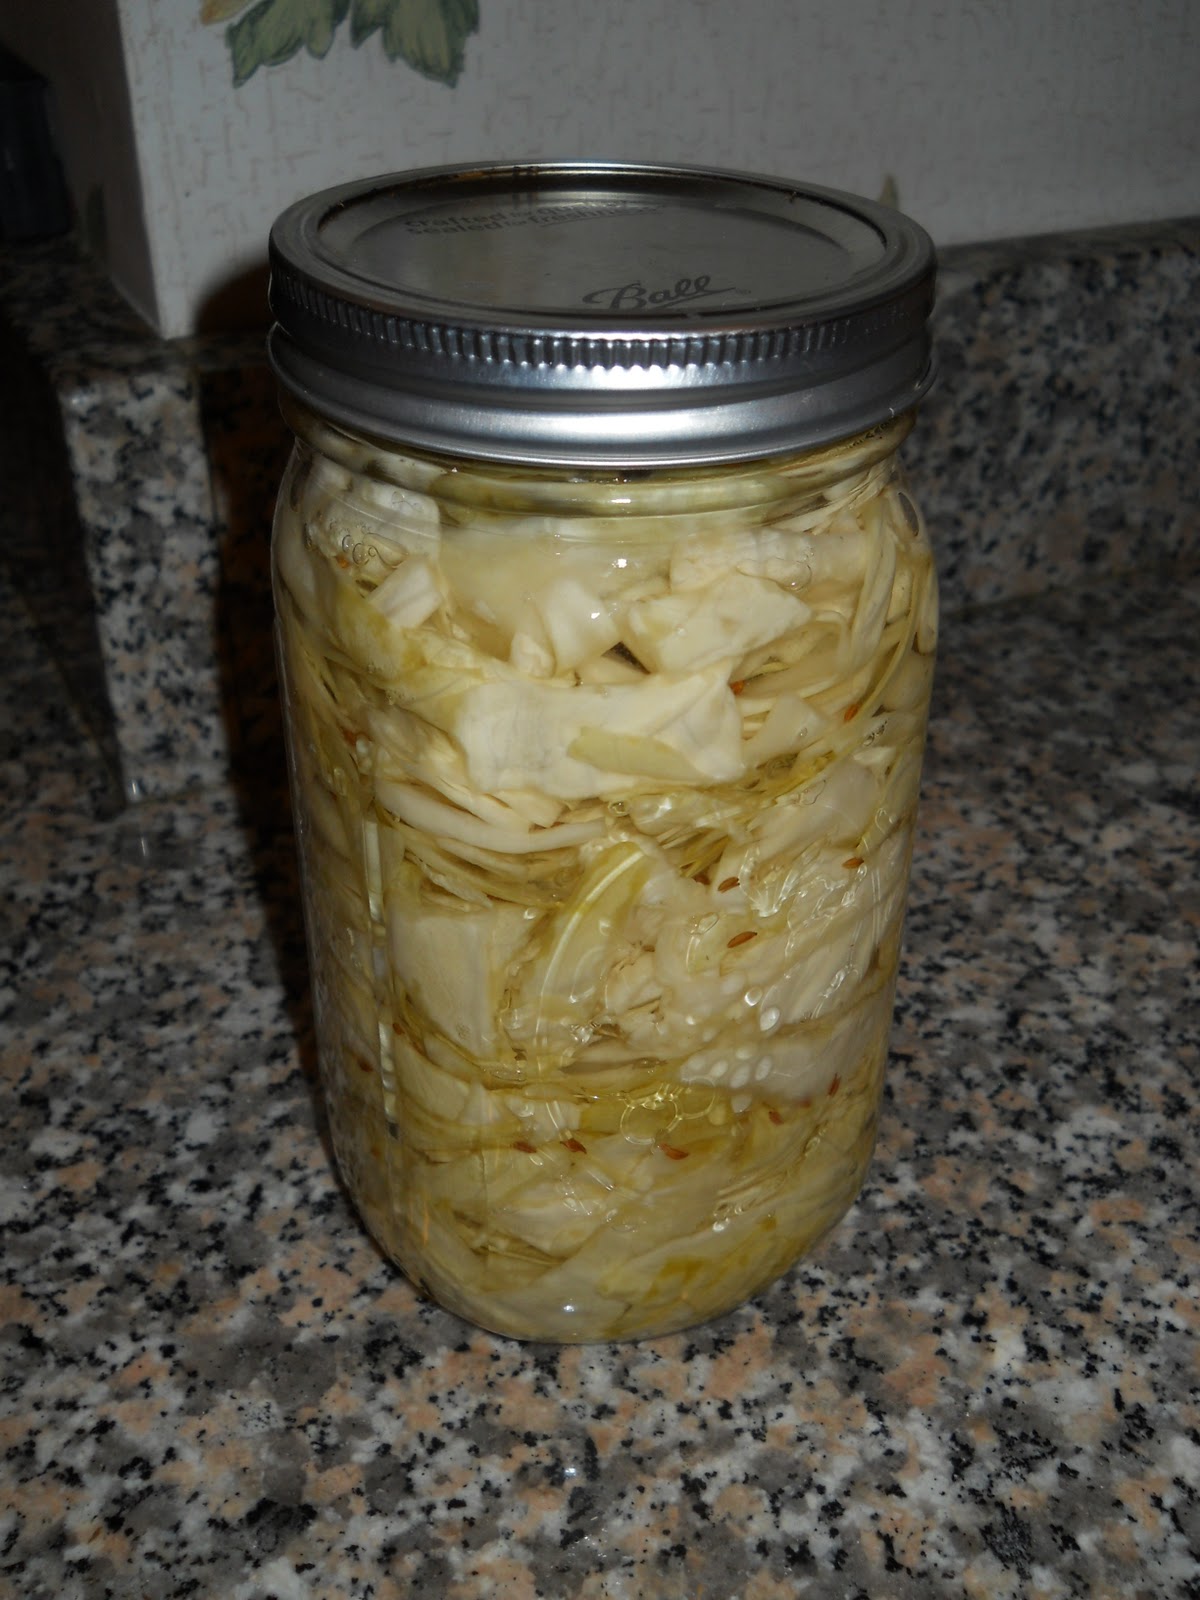
What happens over the next few weeks is called fermentation. Every 4-5 days, I loosened the lids. What a surprise!  A great deal of pressure built up in the jars. I placed the jars on paper towels in a baking pan kept in a room temperature space. More than once, the brew inside the jars spilled out of the jars. Those jars were at work!

This week, 21 days after I packed the kraut, we had the first jar which I rinsed and drained twice and then cooked with onions, carrots, and chicken stock. It is still crunchy and oh, so tasty. Now what to do with my jars? Two choices: they can stay in the refrigerator for six months or they can be canned. I will put some in the refrigerator and can the the rest for gifts. I did two rounds of kraut making and have nine quart jars of this glorious stuff.

An alternate method to making kraut would be the traditional method of placing the cabbage in a crock and covering with the salt water brine and then topping with a plate and a heavy object like a brick to compress the kraut. Once the 21 days have passed, the kraut can then be placed in jars to refrigerate or can. I tasted my kraut several times during the three weeks of brining and at 21 days, the flavors were intense. The kraut can continue to cure beyond the 21 days, up to 6 weeks.

Thursday, September 2, 2010

Yes, I Can!

By Kathryn Washburn Breighner

Canning is in again. The combination of the economy and the desire for quality food has brought canning back. Not that it ever left in my kitchen. My Mom canned, my Grandmas canned, and so I can.

Canning is easy! All you need are some canning jars, lids and jar rings, a jar lifter, a big pot and some fresh veggies.

So far this week, I've canned:

Dilled Green Tomatoes--3 1/3 c each of vinegar and water, 1/4 c salt brought to a simmer. In hot jars (about 10 minutes simmering in the canner), I added a garlic clove, head of dill, dash of hot paprika and then packed in green tomatoes. I covered them with the hot liquid, wiped off the rim of the jars, topped with a hot lid and rim (brought to a simmer in a pan of water), put the jars in the canning pot and boiled for 10 minutes. A friend gave me a jar of these last summer so this year, I had to do my own. Very tasty.This makes 6 pints.

Green Tomato Chutney--I brought to a simmer about 6 large green tomatoes (about 5 lbs), 1 lb. of green apples, 2 large onions--all chopped--with 1 lb of sugar, 1 1/2 c vinegar, 1/4 c each of yellow raisins and dried cranberries, 1 T cinnamon, 2 t mustard seeds, and 2 t pepper corns.  I simmered until thick, about 1 hour, then put in hot pint jars and boiled/canned for 20 minutes. This makes 4 pint jars.

Zucchini Relish--This stuff is great served with kielbasa, pork or hot dogs or as a side dish.  Combine 2 c chopped zucchini, 1 c chopped onion, 1/2 c chopped green pepper, 1/4 c red pepper with 2 T salt and cover with cold water and let stand for several hours. Drain, rinse, drain, rinse. Combine 1 1/2 c sugar, 2 teaspoons celery seed, 1 t mustard seed and 1 c cider vinegar and bring to a simmer. Then add the drained veggies and simmer 10 minutes. Pack into hot jars and can for 10 minutes in a boiling water canner. This makes about 5-6 1/2 pints.

Tomatoes--The garden is producing lots of tomatoes from the 90 plants I have in the garden. We are canning tomatoes every 2-3 nights. Tonight I canned 5 quarts which makes 26 total quarts so far. These are so easy and with tomatoes in season right now, everyone should be canning! Last fall, we canned 65 quarts. We use them all year in soups, stews, sauces, and more. It has been years since I bought a can of tomatoes in the grocery store.

Bring a pot of water to boil to blanch the tomatoes. At the same time, bring the canner pot to a boil with quart jars in it to sterilize them. Wash the tomatoes and drop in the boiling water until the skin breaks, 2-3 minutes, then drop into cold water. Remove the skin and pack the tomatoes into the hot jars. Run a knife around the inside of the jar several times to remove any air. Top with 1 t salt and 2 T lemon juice. Add the lids and rims and can for 45 minutes in a hot water bath.

The best sound for a canner is the sound of the lids sealing when you are finished. Success. Next up for me this weekend are bread and butter pickles and pickled beets. It's canning season!

Saturday, August 22, 2009

Canning Time: Bread & Butter Pickles

By Kathryn Washburn Breighner

We are avid canners. I can't imagine not doing this. Taking veggies fresh from my garden or the farmer's market and canning them is a labor of love. But it also delivers a food product that is far superior than similar store purchased items. And there is no comparison in cost: this is inexpensive. And easy. With no preservatives or chemicals added. Pure and simple foods.

We have a pantry that is filled with items that we can each year: pickles, pickled beets, ajvar (Serbian eggplant & pepper spread), dilly beans (with a tiny, French bean that I grow), peach and grape jam, grape juice, green tomato chutney (outstanding with pork), tomatoes, marinara sauce, tomato juice, salsa. This week I canned something new, a thick, chunky zucchini relish that I can't wait to try on kielbasa.

Because of all that we can, we spend very little on these kinds of foods at the grocery store. Those inside aisles? Rarely do I go there except for baking items, oils, canned beans, or condiments like mustard. Once you have your own canned goods, the grocery store brands, even the pricey ones, just don't taste as good. With increased attention on eating healthy and being cost conscious at the grocery store, canning makes sense.

But I can probably can name only a few people who share this passion. Why more people don't do it, especially foodies, is mystery to me. It's so much fun and delivers such an outstanding food product.

Basic equipment needs: a canner and canning rack, about $19 at a big box store, funnel (to put food in the jars), jar lifter, canning jars and lids (at any garage sale!).

Bread and butter pickles are really good. They have the crispness of the cukes in a spicy sugar/vinegar pickling liquid. Don't even think of buying a bread & butter pickle mix! These are very easy to make. This recipe is a variation of the one in the Ball canning book.

6 c sliced cucumbers, about 1/4" thick, not the tiny dill size but not the huge ones either
1 1/1 c sliced onions
1 1/2 c sliced green or red peppers, or a mixture of the two

I like my pickles to be about 1/2 cukes and the other 1/2 onions and peppers so that when I open a jar months from now, it's almost a salad.

Put the veggies in a bowl, top with 1 c kosher salt and a layer of ice cubes. Let them stand about 2 hours, or overnight in the fridge. The salt brings out all of the liquid in the vegetables so that when processed, the vegetables stay crisp. Drain the veggies in a colander, rinse, and drain again.

In a small saucepan, bring the canning jars and lids to a simmer for 10 min to sterilize.

While the canner is heating up with water and 5 pint canning jars with water to cover by 1", bring to a boil
2 c sugar
3 c vinegar
2 t peppercorns
2 t turmeric
2 T mustard seed
2 t celery seed
1/2 t cayenne pepper

Add the drained vegetables, and simmer for 10 minutes. Remove one of the pint jars from the boiling water canner (sterilizing the jars takes about 10 minutes at a boil), put the funnel in the jar and using a slotted ladle, fill the jar. Stir with a knife to settle the vegetables in the jar. With a ladle, fill the jar with the pickling liquid to within 1/2" of the top of the jar.

Wipe the rims of the jar clean with a damp cloth or paper towel. This removes any spices of vegetables that can make it difficult for the lids to seal. Place a lid and rim on the jar and tighten. Using the jar lifter, put the filled jar back in the canner and remove another jar emptying the water back into the canner as you lift it out.

When all the filled jars are in the canner, cover the canner. Once the water has returned to a rolling boil, start a timer that is set for 10 min.

After 10 minutes, remove the jars with with jar lifting and place on a dish cloth. Very soon, the lids with make a popping sound--you know they have sealed. Check the lids after a few hours to make sure all the lids have sealed. You will see a tiny indentation in the middle of the lid.

Pickles need to sit for 4-6 weeks to fully develop flavor.

Look at all the gorgeous jars of pickles on your counter and smile! I gave a canning lesson to a friend of mine this week. Anyone want to come for a lesson?

Saturday, May 30, 2009

Wild Ramps


by Kathryn Washburn Breighner

When I commented to Perry that we had done a version of one of his pizzas with wild ramps, he had to look up ramps to find out what I was using. Wild ramps are like a wild leek only smaller, with flatter leaves, and with a garlic taste. They are rampant in the woods--rampant ramps that would be--and with our long, cool, spring (freeze warning tonight and it's almost June), the ramps are just waiting for the picking. Ramps can be found as far south as Mississippi and as far west as Iowa.

Marty came back from the woods with a bag full of morels and a bag of ramps. Not a bad hike! Like an onion, ramps can be pulled from the soil. Last weekend, he brought home about 10 pounds of them. They are not the easiest to clean. When done, we had a huge stack of them and decided to pickle them. After a few hours of work, we had 18 gorgeous jars of pickled ramps on the counter.

This was the earliest canning adventure we've done. We are avid canners and in late summer and fall, we process hundreds of jars of various vegetable products.

I did two versions: one spicy and one dilly. These are the perfect cocktail accompaniment. We have been using the fresh ramps in risotto, sauteed with asparagus, on pizza, and in an amazing cheese grits dish with the morels.

For both canned versions, the ramps should be blanched for 30 seconds and then dropped ice water.

Dilled Wild Ramps

This makes 7 pints. Bring to a simmer:
5 c vinegar
5 c water
1/2 c salt

In the bottom of a pint canning jar, add:
1/4 t cayenne
1/4 t dill weed
1 clove garlic

Fill the jar tightly with the ramps, top with the liquid leaving 1/2" at the top of the jar. Process in a hot water bath for 15 min.

Spicy Pickled Ramps


This makes 9 pints. Bring to a simmer:
4 c white vinegar
4 c sugar
4 c water
3 T salt

To each pint jar, add:
1/2 t mustard seeds
1/2 t coriander seeds
1 t fennel seeds
1 t peppercorns

Pack the jars tightly with ramps. Top with the liquid leaving 1/2" of space at the top, process in a water bath for 15 min.